
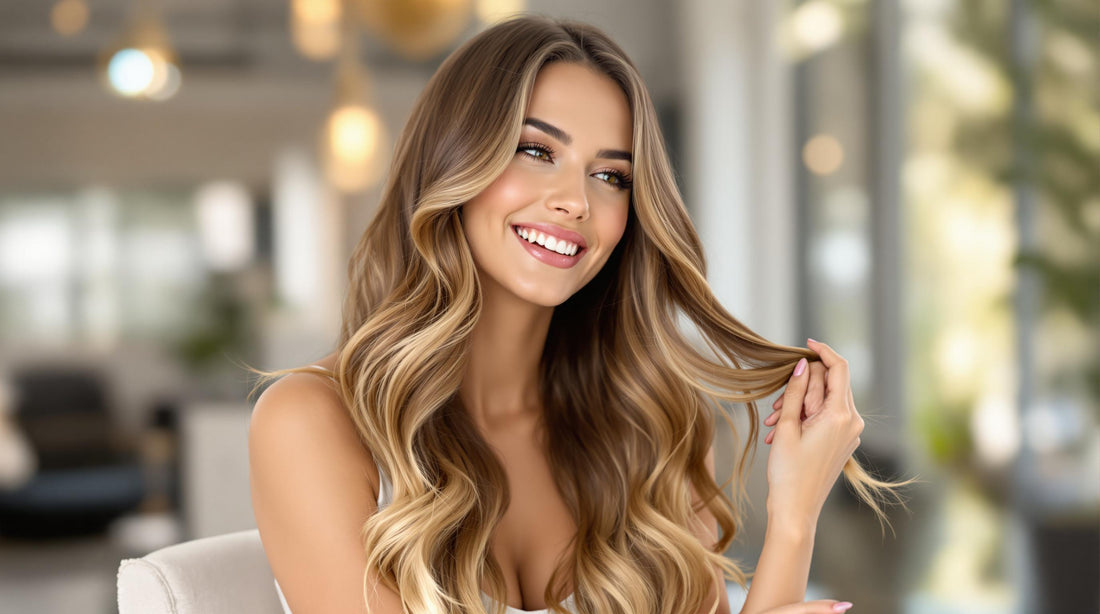
Blending hair extensions with thin hair can be challenging, but it’s achievable with the right techniques. Thin hair requires lightweight extensions, strategic placement, and proper care to avoid damage and ensure a natural look. Here's a quick overview of the key tips:
- Choose the Right Extensions: Opt for lightweight styles like halo or hand-tied wefts.
- Use Fewer Wefts: Prevent strain on thin hair by using only 2-3 well-placed wefts.
- Add Texture: Use dry shampoo and backcombing for better grip and blending.
- Crimp Roots: Create a sturdy base for extensions with subtle root crimping.
- Strategic Placement: Focus on areas like the crown, sides, and nape for natural volume.
- Layer Extensions: Gradual layering avoids the “shelf” effect.
- Color Match: Use techniques like color melting for seamless blending.
- Maintain Extensions: Brush daily, use heat protectants, and wash with sulfate-free products.
- Seek Professional Help: Stylists can customize placement, layering, and color for the best results.
Follow these steps to achieve a natural, fuller look without compromising the health of your hair. Whether you're trying extensions for the first time or looking to improve your technique, these tips will help you blend them seamlessly.
5 Hair Extension Blending Hacks for Natural Looking Results
1. Pick the Right Type of Extensions
When it comes to thin hair, selecting the right extensions is key. Human Remy hair extensions are a great choice because they offer a natural look, feel lightweight, and are gentle on delicate strands. Styles like micro ring, halo, and hand-tied wefts work especially well for thin hair since they put less stress on your natural hair and move naturally.
It's important to go for lightweight extensions to avoid causing breakage or further thinning. To achieve a seamless look, match the extensions to your hair's texture and density. For example, PHE Salon in Jupiter, Florida, provides free consultations and specializes in tailored solutions for thin hair. They use premium organic and Remy hair options to ensure your extensions blend perfectly with your natural hair.
After selecting the right extensions, focus on keeping them discreet by using fewer wefts for a more natural appearance.
2. Use Fewer Hair Wefts
When working with thin hair, it's important to limit the number of wefts to keep things looking natural and to avoid putting unnecessary strain on fragile strands [1]. The trick is finding the right balance - adding just enough volume while protecting your natural hair.
Using only 2-3 well-placed wefts can do the job without overwhelming thin hair. For example, placing a single weft around ear level can add volume to the sides without the need for layering multiple pieces. Focus on adding layers where they’re most effective, like the crown or sides, for a lightweight and natural finish.
Here’s why fewer wefts work better:
- Less Stress on Hair: Reduces the risk of breakage by keeping the weight off your natural hair.
- Improved Movement: Hair looks and feels more natural with better bounce.
- Easier Blending: Creates a smoother transition between extensions and your own hair.
- Low Maintenance: Fewer pieces mean less effort in daily styling.
When applying extensions, prioritize strategic placement over full coverage [2]. Position the wefts where they’ll have the biggest impact, such as the crown and sides. This approach keeps the extensions lightweight while still achieving the desired volume [3].
Consider lightweight options like hand-tied or halo extensions. These styles sit flat against the scalp and avoid the bulk of traditional wefts, offering a natural look with fewer pieces [2]. Thoughtful placement not only reduces weight but also helps the extensions blend seamlessly with your hair.
With the right number of wefts in place, the next step is to focus on enhancing texture for a flawless, natural blend.
3. Add Texture with Dry Shampoo
Using dry shampoo can help prevent extensions from slipping and create a natural look, especially with thin hair. This product adds grip and volume to fine strands while keeping things lightweight.
Here’s how to apply it effectively: lift small sections of your hair, spray the dry shampoo at the roots from about 6 inches away, and gently massage it in to create volume. Pay attention to these key areas:
- Crown: Adds overall lift and fullness.
- Temples: Prepares the areas where extensions will be placed.
- Nape of the neck: Helps secure the bottom wefts.
Volumizing dry shampoo not only lifts the roots and controls oil but also helps your extensions blend better with your natural hair. Use it sparingly at the roots to avoid buildup, which can shorten the lifespan of your extensions [1].
Pick a volumizing or texturizing dry shampoo for added grip and body [2]. Apply it before attaching extensions and touch up as needed throughout the day to keep volume and ensure the extensions stay secure.
Once you’ve added the texture, move on to styling techniques like backcombing to keep your extensions in place.
4. Backcomb Hair for Better Blending
Backcombing is a helpful technique for blending extensions with thin hair. Gently tease the roots at the crown, sides, and nape to add texture and lift. This ensures the extensions stay in place and the attachments remain hidden [1]. Work in small sections from front to back, focusing on the areas where the extensions will be applied.
Key areas to backcomb:
- Crown: Adds overall volume.
- Side panels: Helps secure clips.
- Nape: Keeps the bottom wefts stable.
Be gentle, especially if your hair is fine, and avoid overdoing it during installation or adjustments [3]. Building on the texture from Step 3, this method helps the extensions lay flat while blending naturally with your hair.
Apply just enough pressure to create texture without causing discomfort or damage. Once the foundation is set, you’ll be ready to place your extensions for the best results [5].
5. Crimp Roots for Extra Hold
If you have fine hair and need a stronger base for extensions, crimping can be a game-changer. This method builds on the texture created by backcombing, offering a sturdier foundation. Use a mini crimper on a low heat setting to add a subtle texture to the roots, which helps extensions stay in place. Always apply a heat protectant beforehand to safeguard your hair.
Here are some tips for effective crimping:
- Work with small sections for better control.
- Crimp only the first 1–2 inches of the roots.
- Stick to the lowest heat setting that gets the job done.
Unlike backcombing, crimping creates a texture that lasts longer, giving your extensions a more secure hold over time. It not only boosts grip but also adds volume, all while being gentle on your natural hair [1].
Focus on crimping the areas where your extensions will go [3]. This targeted approach ensures a stable base, making it easier to achieve long-lasting volume exactly where you want it. Once the roots are prepped, correctly placing the extensions will maximize the effect.
sbb-itb-4220d4e
6. Place Extensions Where Volume is Needed
To create natural-looking volume for thin hair, focus on placing extensions in key areas like the crown, sides, and nape. Adding extensions at the crown can give height, the sides can add dimension, and the nape can provide layering. Thoughtful placement helps the extensions blend smoothly with your natural hair, avoiding a bulky or unnatural look.
With thin hair, it’s often better to use fewer wefts placed carefully rather than overloading your hair with too many extensions. Techniques like the tight-line method use thin wefts positioned precisely to add subtle, discreet volume [4].
For optimal results, professional stylists - such as those at PHE Salon - can tailor the placement to suit your hair type and desired outcome. Once the extensions are properly placed, layering them can help achieve a flawless, natural finish.
7. Layer Extensions to Match Your Hair
Layering plays a key role in blending extensions with thin hair. It adds depth, mimics natural movement, and avoids the dreaded "shelf" effect. Start with shorter extensions at the nape and gradually increase the length toward the crown. This gradual transition helps extensions look natural rather than bulky or out of place [3].
Experienced stylists, like those at PHE Salon, focus on personalized layering techniques tailored to your hair's natural pattern and your desired style. Opting for lightweight extensions in varying lengths can make blending easier while keeping the movement and volume looking natural. Regular upkeep is essential to maintain the layered effect and ensure the extensions continue to blend smoothly with your own hair.
Once your extensions are layered correctly, the next step is to match the colors perfectly for an effortlessly natural finish.
8. Match Colors for a Natural Look
Getting the color right is key when working with thin hair. Even small differences in shade can stand out, so it's important to choose extensions that blend perfectly with your natural hair color while adding soft dimension.
A great technique for thin hair is color melting. This method uses complementary shades to create a smooth, natural gradient. For example, combining lighter and darker tones with a medium brown base can add depth without creating a harsh contrast. Pairing this with layering ensures the extensions mix seamlessly with your hair, avoiding visible lines.
Here are a few things to keep in mind when choosing extension colors:
| Color Aspect | What to Do |
|---|---|
| Base Color | Match your root color and undertones (whether warm or cool) |
| Dimension | Use 2-3 complementary shades, placing lighter tones near the face for a soft effect |
If your hair is color-treated, it's a good idea to consult a stylist for custom-matched extensions. Also, use color-protecting products and plan on maintenance every 4-6 weeks. This helps keep the tone consistent, as both natural hair and extensions can change color over time due to washing or environmental exposure.
For a seamless look, opt for subtle, lighter tones that blend easily with thin hair. This minimizes contrast and keeps the overall appearance natural and effortless. The goal is to enhance your hair without it looking overdone.
Once you’ve nailed the color match, proper care is the next step to maintaining that flawless blend.
9. Take Care of Extensions Regularly
Keeping extensions looking natural with thin hair requires consistent care. Over-washing can cause dryness, while not washing enough leads to buildup - both can make blending a challenge. Aim to wash your extensions 1-2 times a week using sulfate-free products.
Here are some tips to keep your extensions in great shape:
- Brush daily with a soft-bristled extension brush to prevent tangles.
- Use heat protectant before styling, and keep tools on low heat settings.
- Protect your hair at night by sleeping on a silk pillowcase or tying it in a loose braid.
- Schedule regular check-ups with a professional to ensure proper placement and blending.
- Avoid harsh products like clarifying shampoos, alcohol-based stylers, or oils near the roots, as these can weaken the bonds.
Gentle handling is key to preserving both your natural hair and the extensions. Professional touch-ups can address any separation between your hair and the extensions, keeping everything looking seamless.
10. Get Professional Help for Custom Extensions
If you have thin hair, working with a professional can make all the difference in achieving a natural, flawless look. While you can do a lot on your own with the right tips, a stylist’s expertise ensures precision and long-lasting results. They’ll assess your hair’s specific needs and recommend the best extension options for you.
Salons like PHE Salon in Jupiter, Florida, offer consultations to evaluate factors like:
- Hair density and texture
- Current condition of your natural hair
- Your desired style and look
- Care and upkeep requirements
Here’s what a professional stylist brings to the table:
- Customized placement based on your hair’s natural growth patterns
- Perfect color matching to ensure seamless blending
- Layering techniques designed specifically for thin hair
- Determining the right amount of wefts for your needs
Regular maintenance appointments (every 4–6 weeks) are also key. These visits allow your stylist to:
- Adjust the extensions as your natural hair grows
- Fix any blending issues before they become noticeable
- Check the health of both your hair and the extensions
- Make tweaks to keep the extensions looking seamless
Professional installation doesn’t just look better - it also helps avoid problems like visible tracks, poor placement, or damage to your natural hair. While it may cost more upfront, expert services can actually save you money in the long run by extending the life of your extensions and keeping them in great shape.
Conclusion
Blending extensions with thin hair takes the right methods, quality products, and expert advice. Together, these elements create a natural look that enhances your hair without causing damage or appearing unnatural.
Using fewer wefts in strategic spots adds volume while avoiding strain on finer strands. Choosing extensions that match your hair's color and texture ensures a smooth and balanced appearance.
Daily upkeep plays a big role too. Tools like dry shampoo and backcombing can improve how well your extensions blend. Combined with proper care, these steps help maintain the look over time.
Professional help is a game-changer. Salons like PHE Salon in Jupiter, Florida, specialize in extensions for thin hair, offering personalized consultations to match your style and hair type. Their expertise ensures extensions that look natural and protect your hair.
For the best results, combine these key factors:
- Thoughtful Selection: Opt for lightweight, high-quality extensions that suit your natural hair.
- Precise Application: Use techniques tailored for thin hair to ensure a seamless blend.
- Consistent Care: Stick to professional recommendations for maintenance.
- Stylist Expertise: Rely on skilled professionals for both application and upkeep.
These steps address the specific needs of thin hair, helping you achieve a fuller, more natural look while keeping your hair healthy. With the right approach and professional guidance, you can transform your hair into a style you’ll love.
FAQs
How to blend extensions with thin hair?
Blending extensions with thin hair takes the right approach and tools. First, pick extensions that suit your hair type. Options like tape-in, micro-ring, or halo extensions are lightweight and gentle, making them great for thin hair.
Here are some tips to achieve a natural look:
- Add texture at the attachment points to help the extensions blend better.
- Place the extensions strategically to create natural-looking volume.
- Match the color of the extensions to your hair for a seamless finish.
- Stick to a regular maintenance routine to keep everything in place.
For thin hair, medical-grade adhesives can provide a secure yet gentle hold. A little dry shampoo can also work wonders by adding texture and improving the grip between your hair and the extensions. Keep in mind that using fewer wefts in the right spots often looks better than overloading your hair with too many pieces.
Maintenance is key to keeping the extensions looking natural:
- Visit a professional stylist every 6-8 weeks for check-ups.
- Use hair care products designed for extensions.
- Style your hair carefully to avoid damage.
For personalized advice, it's always a good idea to consult a professional stylist. They can ensure the extensions are applied correctly and help you maintain them for the best results.
1 comment
This was so helpful! 💕 I’ve been trying to decide what type to go with, and the way you explained things makes it way easier. I’m leaning toward a deep wave weave next time because I love that textured, voluminous look it gives.
https://www.indiquehair.com/products/remix-deep-wave